Last week we put together a cradle. For the base of the cradle we recycled the bottom of the crate in which Tim packed our plywood kits. We traced out the bottom of frames 53.5, 124, and 169.5 onto OSB, cut them out, and then attached them in their respective places with some 2x4's.
At the time it seemed like it might be a good idea to include support on the cradle for the boat's side panels, but experience pretty quickly showed us that wasn't such a hot idea, so they got cut off. It's not the prettiest cradle out there, but it seems to work pretty well.
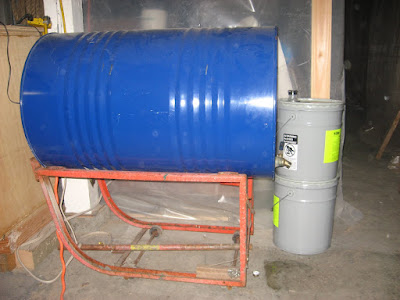
We also have started to accumulate stuff. Lots of stuff. This is fifty gallons of epoxy resin and 10 gallons of hardener:
And this is a 10 pound bag of colloidal silica:
Yeah, colloidal silica doesn't weigh very much.
This week we managed to put together what looks like a boat-shaped object. After some hemming and hawing and head-scratching, we managed to stitch together the hull bottom, side panels, stem, and transom. It's pretty impressive; a few days ago we didn't have anything but a pile of plywood and all of a sudden we have what might technically be a boat.
Once the fillets are in it becomes much harder to bend the panels with respect to each other, so we wanted to make sure the panels were roughly oriented to each other in their final configuration. To do this, we trial-fit a few of the frames, and we discovered, as others have, that to get the frame in correctly requires a little muscle.
You might also notice in the above picture that the frame has been pre-painted with epoxy. The idea was to get them wet-out with epoxy now so there's less crawling around later. The one problem has been that our shop is not heated, so the epoxy has been a little slow to cure, and it's a little unwieldy to wrestle with panels that are still tacky.
For our stitch-and-glue method, we're using little pieces of electrical conduit to ensure the panels line up nicely corner-to-corner. A lot of people out there have advocated for zip-ties instead of copper wire, but we're going with copper wire because you can get a lot more leverage on the copper wire and really force the panels to comply with our wishes. For the fillets we're using epoxy thickened to peanut butter consistency with colloidal silica.
We also got three 8' lengths of 2x2 lumber scarfed together to form the sheer clamp. Once the epoxy has setup we'll rip it along the diagonal and install it. I forgot to take pictures of this, but I'll include some next time.
So, things are moving along. This weekend we'll probably get started on installing some frames and taking care of other assorted details. Fortunately, we'll have supplies to keep us going...


I think you guys will like the copper wire better than the ties....I did a bit of both and found the zip ties needed bigger holes to pass through, can't be released w/out cutting off all together and definitely don't offer the same level of persuasion if a panel is not cooperating.
ReplyDeleteI'm a little jealous of your "gang", it can get lonely in the garage, but also see where it might be a CF at times. Hope you guys continue to progress and enjoy!!!
Ben
bensboogers